PSA Flyer
The PSA Flyer project gives you an opportunity to make a real impact with your design skills. Your mission is to influence an audience into a socially beneficial behavior. The subject matter could range from:
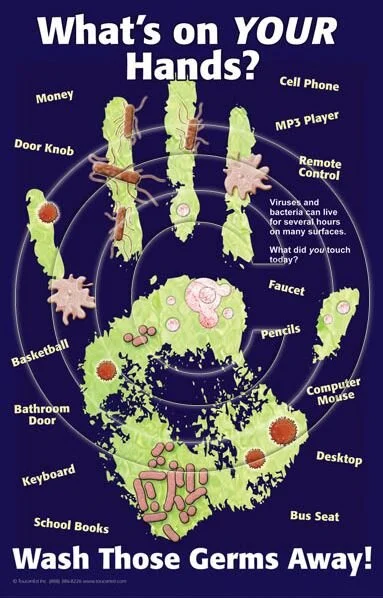
Advocating for hand washing
Reminding to wear a mask
Preventing smoking/vaping
Avoiding texting while driving
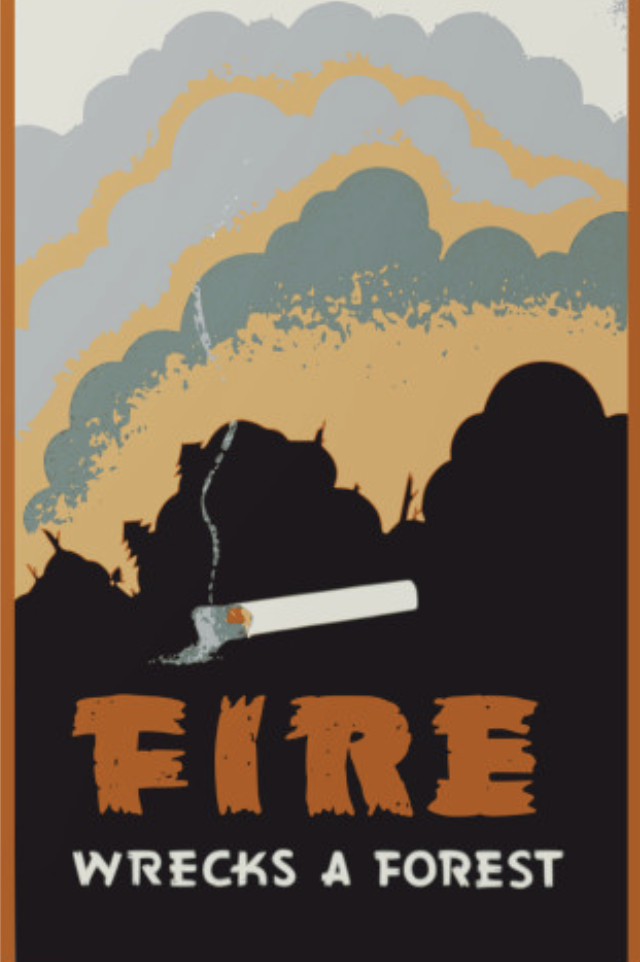
Preventing wildfires
Getting out the vote (non-partisan)
Or dozens of other causes
As a design challenge, this project can span the full range of design content including:
photography
typography
design elements
visual fx
textures
illustration
As with all course projects, keep in mind that your work will be assessed by:
Professionalism - project is done "to spec", follows directions, and fulfills requirements.
Craftsmanship - project exhibits an admirable application of design principles and use of tools.
Originality/Effort - content is unique (not copied or derivative) and the solution is challenging.


Process
1. Communicate
The PSA Flyer design process beings with a short questionnaire. The answers you get from this questionnaire should provide you with a clear design brief.
Here are the essentials questions to ask your client (note: feel free to added more as needed):
What social cause or behavior do you want to address?
What would move your audience? What compelling stats can you find? What instructions could you provide?
2. Research
Based on your design brief, visit the following websites and conduct some PSA related searches:
Google (image search and data search)
Dafont (be sure to use custom sample field)
Google Fonts (be sure use custom sample field)
Coolors (come up with a color scheme)
Behance (for layout and style inspiration)
YouTube (for Ps Tutorials related to target style)
As fonts, images, PSAs, layouts, etc. resonates with you, screen grab them (cmd+opt+4 on a Mac, Win + shift + S on a PC). After you have at least 20 or more assets, drop the collective images into gomoodboard.
Make sure to save an editable link to your moodboard and share it with the client to assure you are on the same page.
*Make sure you do a “large” image search for higher-res photos. If you find something you really like, be sure to download the image not just a thumbnail.
3. Ideate
Based on your moodboard, grab your sketchbook and draw at least 4 possible layout solutions.
From these initial 4 solutions, selected one. Flip the page over and draw 4 new variations based on the initial solution you selected.
From this second round of 4, pick your top solution.
Before you fully commit and jump into Photoshop, be sure to get some feedback from the client - and be open to suggestions. Together, you might come up with an even better solution.
Then hop into Photoshop or Illustrator - make sure you setup the document properly (see: Specs and Standards below).
4. Finalize
Before you turn in this project - be sure to save 2 versions:
1 Source - with all fonts and guides still retained (“last-first-project-01. psd”).
2- Turn In - as a .jpg resized to less that 1000px for whichever axis is longer.
This will give you options to re-edit or share your work whenever you like. (For initial setup, see “Specs and Standards” below).
Specs and
Standards
Because there are a huge range of possible PSA solutions, the requirements are purposefully broad - but please note the following:
In general, your solution should show considerable research, creativity, and effort (not just a good photo with text on top).
Downloaded photos (pexels.com recommended here) or original photos can be used - but illustrated content must be your own (no clip art, sillouhettes, etc. since you know Adobe Illustrator and should make your own to assure your solution is unique.)
An original/creative mix of content. The media that makes up your PSA Flyer might include a combination of any of the following:
Photography
Typography
Illustration
Design Elements
Textures
Visual FX
Typographically, your PSA must have:
1) A clear “call to action” - typically larger type that inspires change.
2) A resource - a link to an org that can provide viewers with more info, help, and resources related to your selected topic.
Lastly, your PSA Flyer needs to be on spec. should be setup in Photoshop with following specs:
8.5 x 11in - @ 300ppi
8-bit RGB
The poster should be turned in as a .jpg file with the largest dimension no more that 1000px.
Issues and
Guidlines
Given the range of potential organizations and events, the solutions for this project can vary widely.
But here are some common issues and helpful guidelines to consider.
LESS IS MORE

Optimize impact by using the minimum amount to type. Clarify importance using visual hierarchy, white space, and composition.
SHOW, DON’T TELL

A picture tells 1000 words. Far better to show a location, event, people, etc. than trying to describe them with words.
CONFIRM COLOR

Confirm with the client if they can print in color before finding/taking photos. Make sure images still work well in grayscale.
MIND THE GAP

Unless the client can print borderless, keep content (especially type) inside the printable “image safe” area of the media.